Vault Setup on AWS EC2 Instance
Prerequisites:
- A Linux ec2 instance.
- Access to the ec2 instance over ssh.
- In the Security group, port 8200 open to access vault UI, API, and SSH access.
Step 1: Download the vault binary to /opt location with below command
cd /opt/ && sudo curl -o vault.zip https://releases.hashicorp.com/vault/1.1.2/vault_1.1.2_linux_amd64.zip
Step 2: Unzip the vault executable.
sudo unzip vault.zip
Step 3: Move the vault executable to /usr/bin directory.
sudo mv vault /usr/bin/
Step 4: Create a user named vault to run as a service.
sudo useradd --system --home /etc/vault.d --shell /bin/false vault
Configure Vault as a System Service
Step 1: Create a vault systemd service file.
sudo vi /etc/systemd/system/vault.service
Step 2: Copy the below configuration to the service file.
[Unit]
Description="HashiCorp Vault Service"
Requires=network-online.target
After=network-online.target
ConditionFileNotEmpty=/etc/vault.d/vault.hcl


[Service]
User=vault
Group=vault
ProtectSystem=full
ProtectHome=read-only
PrivateTmp=yes
PrivateDevices=yes
SecureBits=keep-caps
AmbientCapabilities=CAP_IPC_LOCK
Capabilities=CAP_IPC_LOCK+ep
CapabilityBoundingSet=CAP_SYSLOG CAP_IPC_LOCK
NoNewPrivileges=yes
ExecStart=/usr/bin/vault server -config=/etc/vault.d/vault.hcl
ExecReload=/bin/kill --signal HUP $MAINPID
StandardOutput=/logs/vault/output.log
StandardError=/logs/vault/error.log
KillMode=process
KillSignal=SIGINT
Restart=on-failure
RestartSec=5
TimeoutStopSec=30
StartLimitIntervalSec=60
StartLimitBurst=3
LimitNOFILE=65536


[Install]
WantedBy=multi-user.target
Step 3: Create the vault configuration, data & logs directory. Also change the ownership of vault directory to vault user.
sudo mkdir /etc/vault.d
sudo chown -R vault:vault /etc/vault.d
sudo mkdir /vault-data
sudo chown -R vault:vault /vault-data
sudo mkdir -p /logs/vault/
Step 4: Create a vault.hcl file which holds all the vault configuration.
sudo vi /etc/vault.d/vault.hcl
Step 5: Copy the below configuration and save the file.
listener "tcp" {
  address     = "0.0.0.0:8200"
  tls_disable = 1
}

telemetry {
  statsite_address = "127.0.0.1:8125"
  disable_hostname = true
}

storage "file" {
  path = "/vault-data"
}

ui = true
Step 6: Enable, start and check the status of vault service.
sudo systemctl enable vault
sudo systemctl start vault
sudo systemctl status vault
Step 7: Access the vault UI using the public IP /Private IP on port 8200 as shown below.
http://54.218.168.196:8200/ui with your public IP
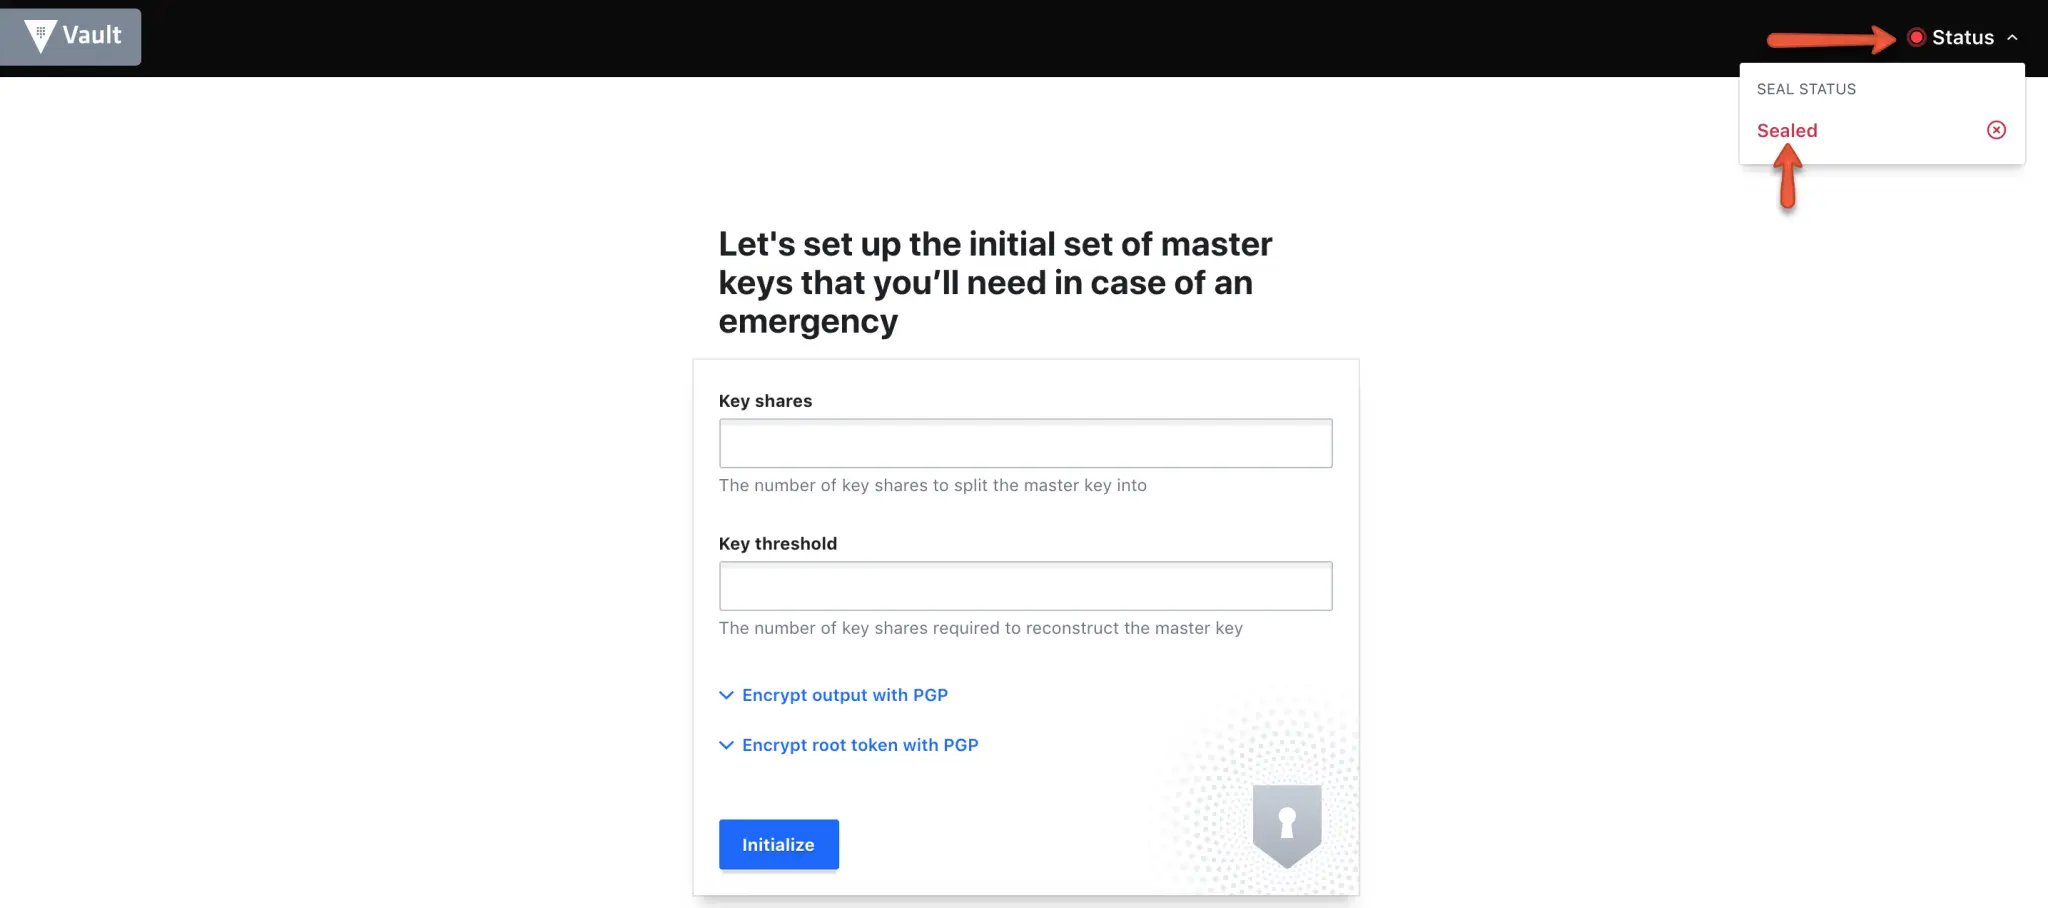
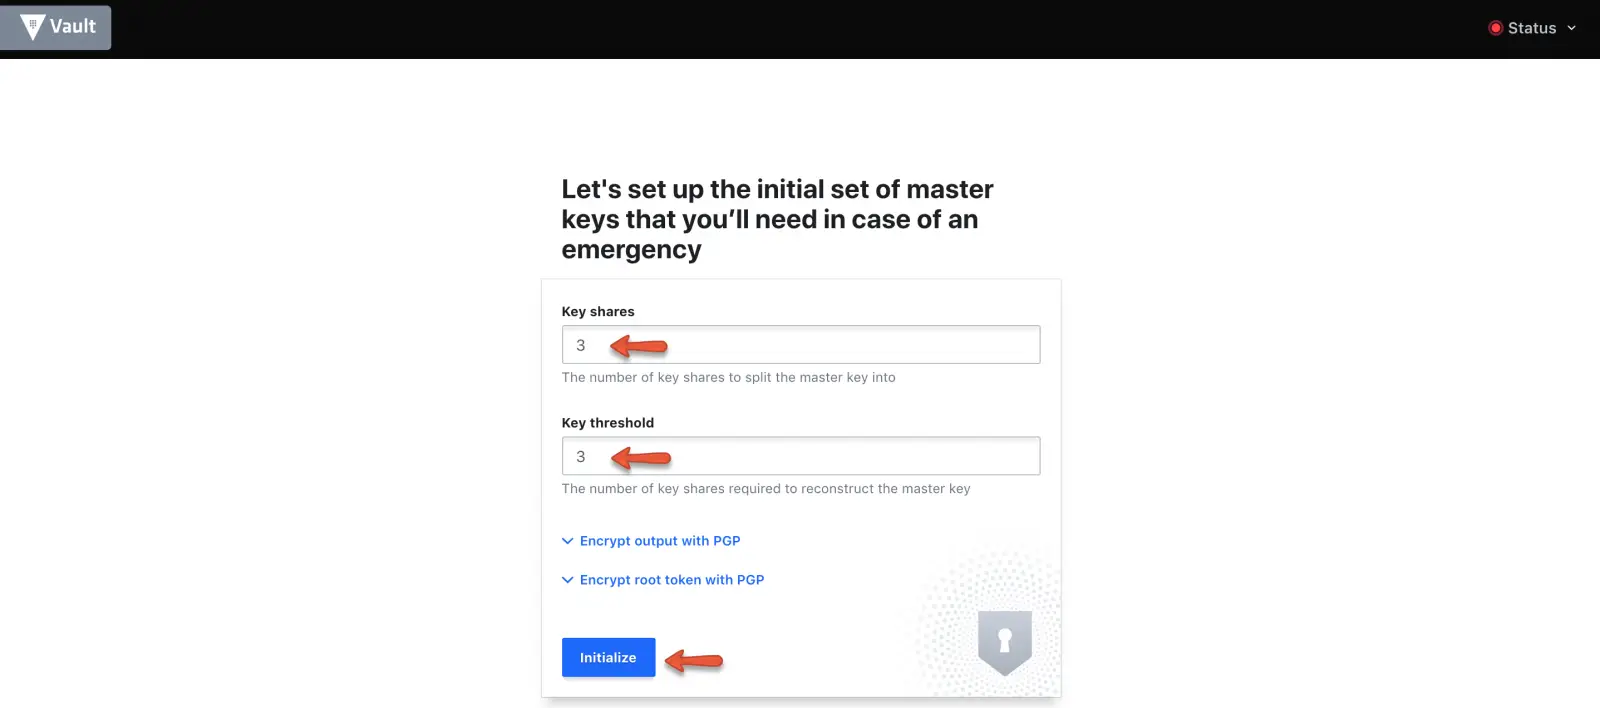
Step 8: Initialise vault using initialise button with 3 key shares.
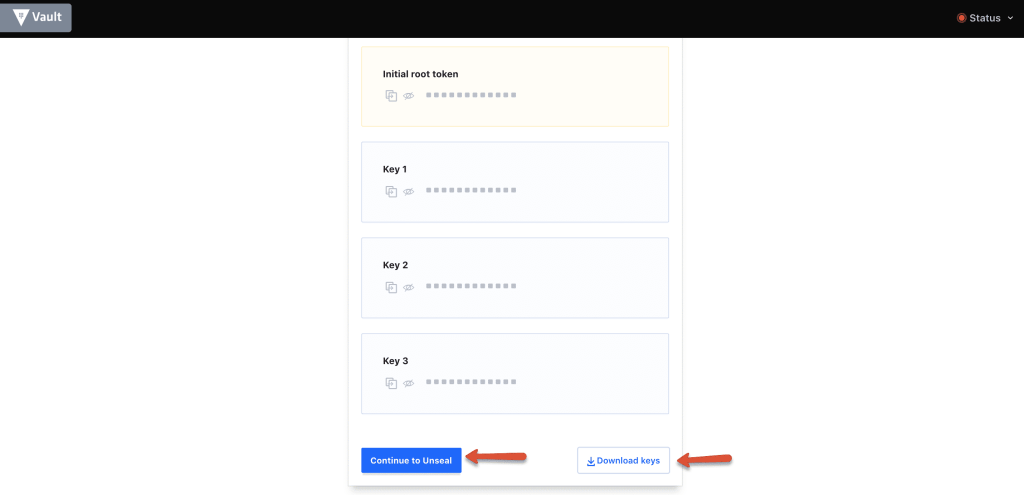
Step 9: Download the keys using the “Download Keys” button and click “continue to unseal” button.
Note: The key files is very important and you should keep it safe. For any reason if you restart the server or vault service, vault get locked. You will need these keys to unlock it.
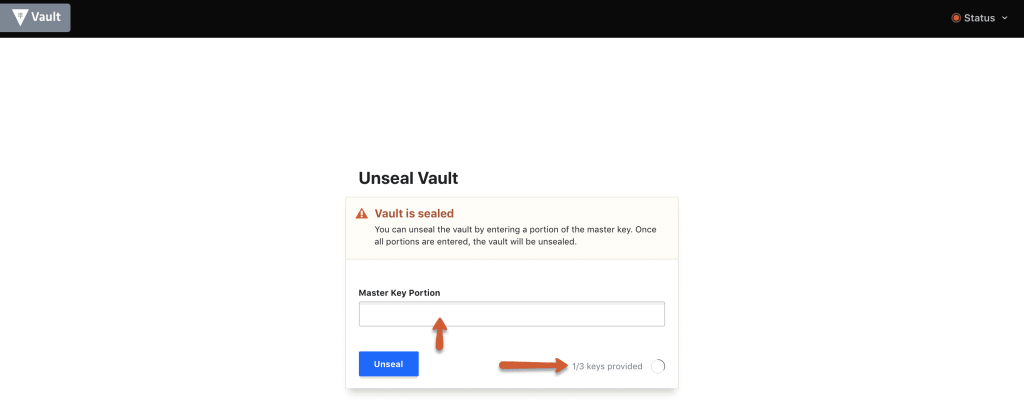
Step 10: Enter three keys one by one from the downloaded key file to unseal vault.
Step 11: Once unsealed, login to vault with the root_token from the downloaded key file.
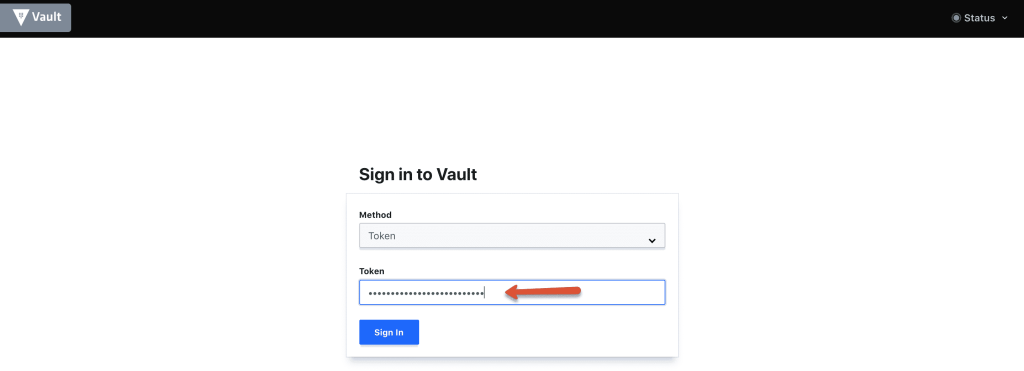
Thats it! You will be logging in to vault server with all default settings.